How to install Xpenology into an internal eMMC or SSD?
Preface
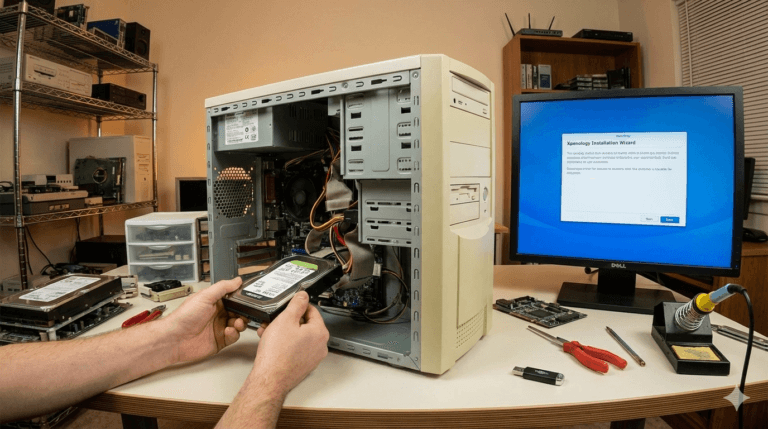
Traditional XPenology systems typically use a USB flash drive as the boot disk. Using a USB drive not only occupies a USB port but also poses a potential threat to system reliability due to the quality of the drive itself and its long-term stability issues. However, some dedicated NAS machines now have a built-in eMMC or SSD module. This allows the system to be installed on the eMMC or SSD, eliminating the need for an external USB drive and significantly improving stability, aesthetics, and security.This article will guide you step-by-step through safely and smoothly installing the Xpenology system onto an eMMC or SSD.
Preparation
- USB flash drive with a capacity greater than 8GB
- WePE software
- RR Image(Xpenology Image)
2, 3 You can download it from the official website(WePE and RR), or from the link I’ve packaged.
1. Creating a PE System
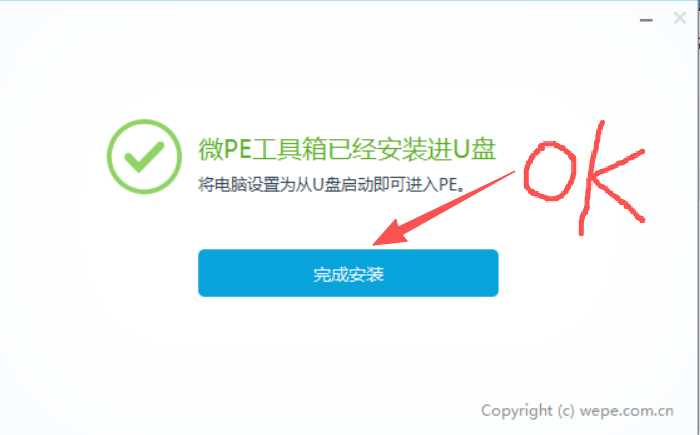
First, insert the prepared USB flash drive into the computer, open the WePE software, and complete the following steps. The instructions in the images are in Chinese; don’t worry if you don’t understand them, just follow the steps marked on the installation images.
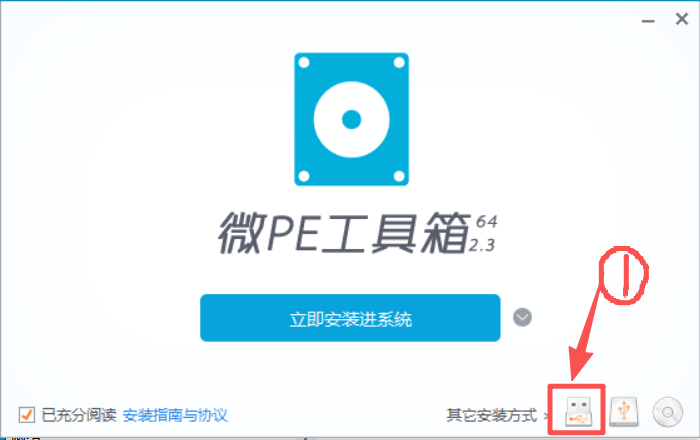
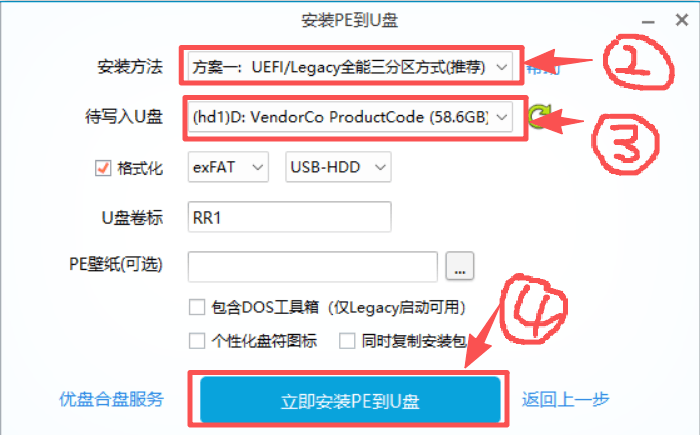
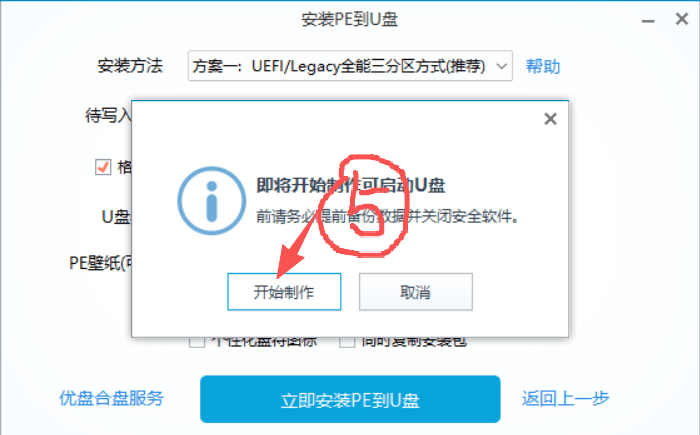
Warning: The USB drive will be formatted. Please back up the data on it.
2. Change machine BIOS configuration
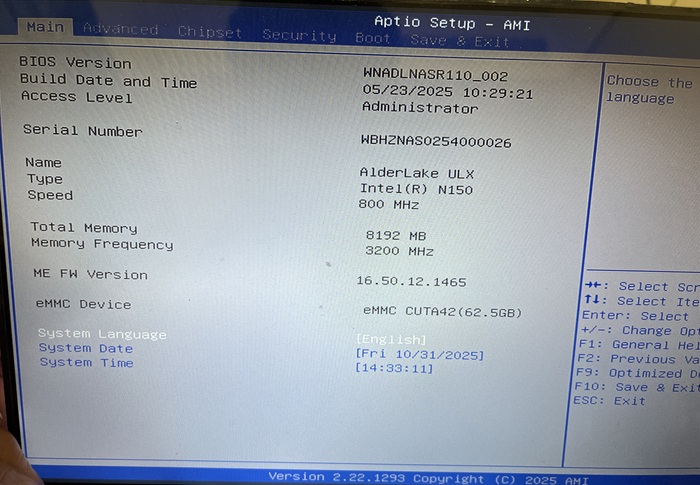
We’ll use the NASBOOST N41 as an example. During startup, repeatedly press DEL or F2 to enter the BIOS system (the method may vary depending on the machine).
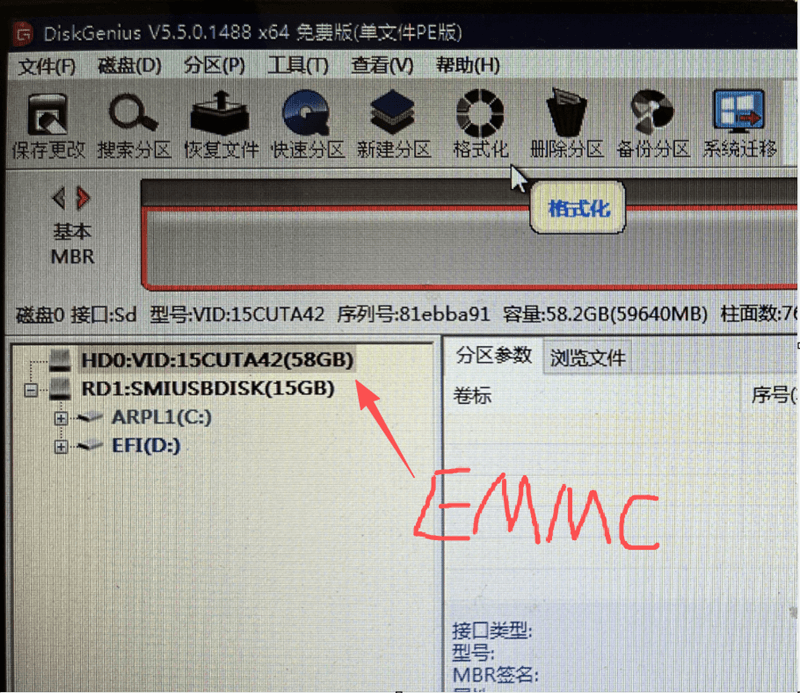
Once in the system, we can see the device’s basic status: Intel N150 processor, 3200MHz RAM, 8GB memory, and a built-in 64GB eMMC drive. As a 4-bay NAS, this machine is sufficient for our daily use.
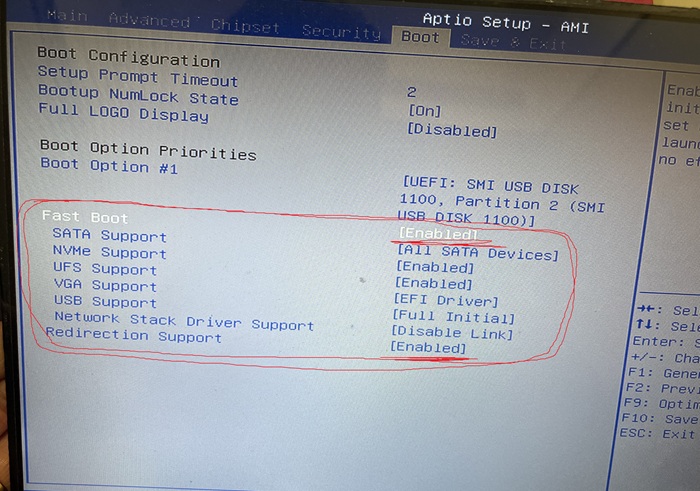
Select BOOT, then enable Fast Boot -> enable Redirection Support. Save and exit.
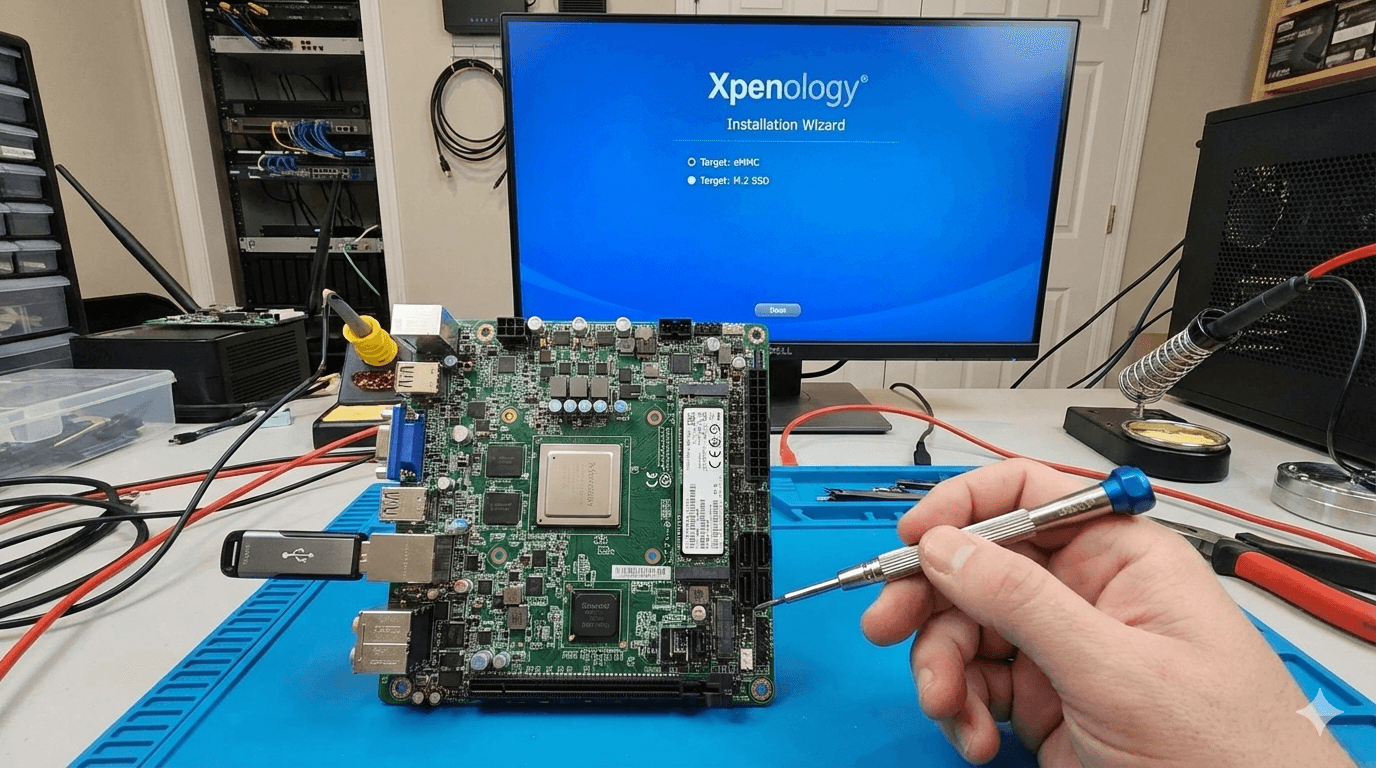
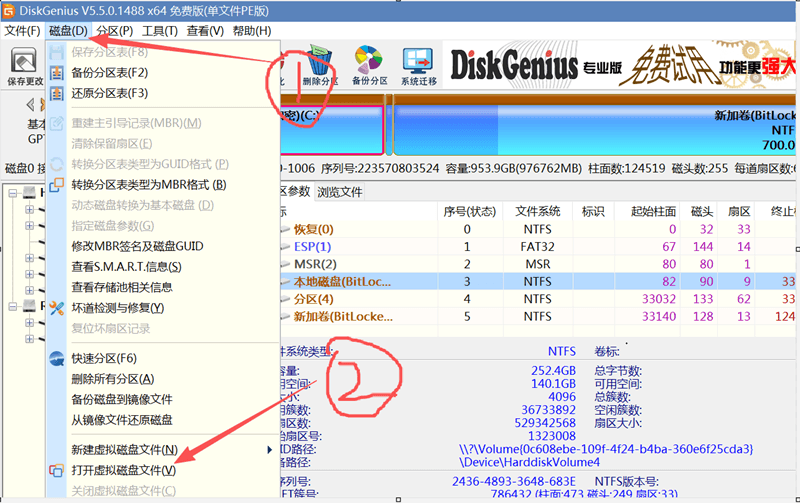
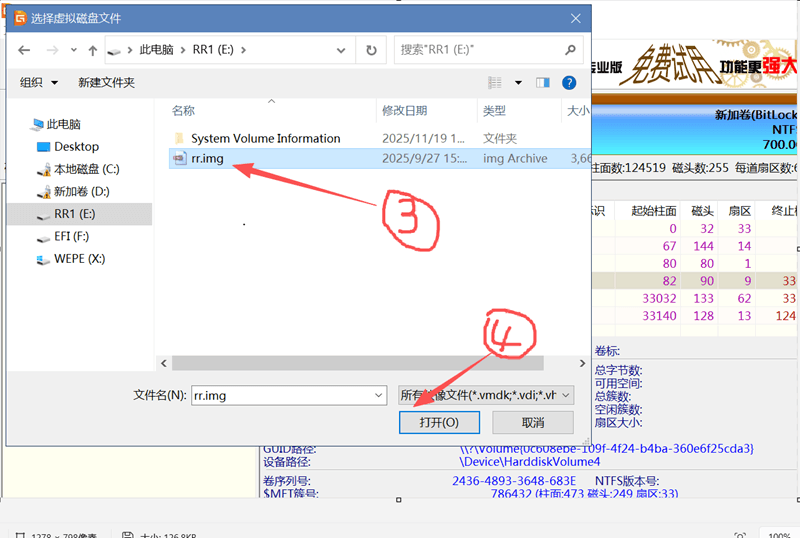
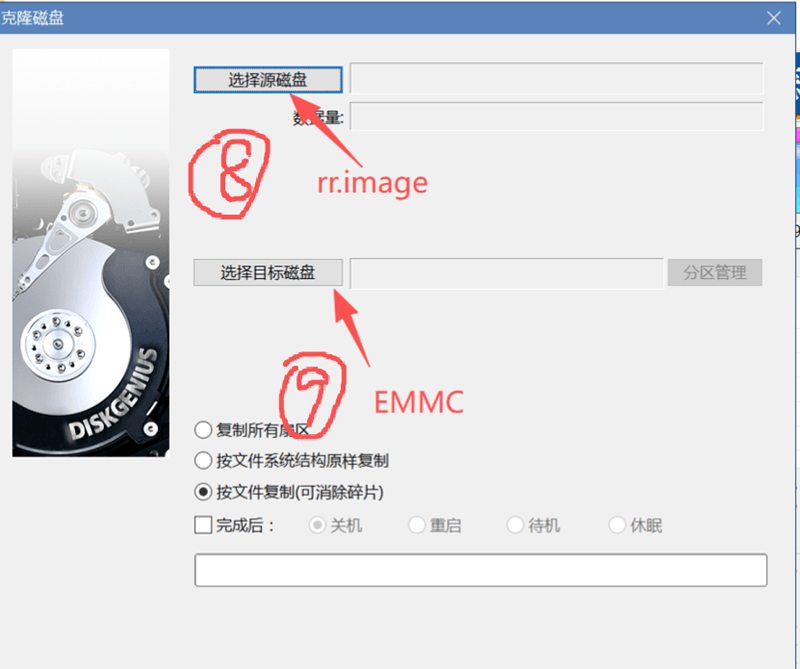
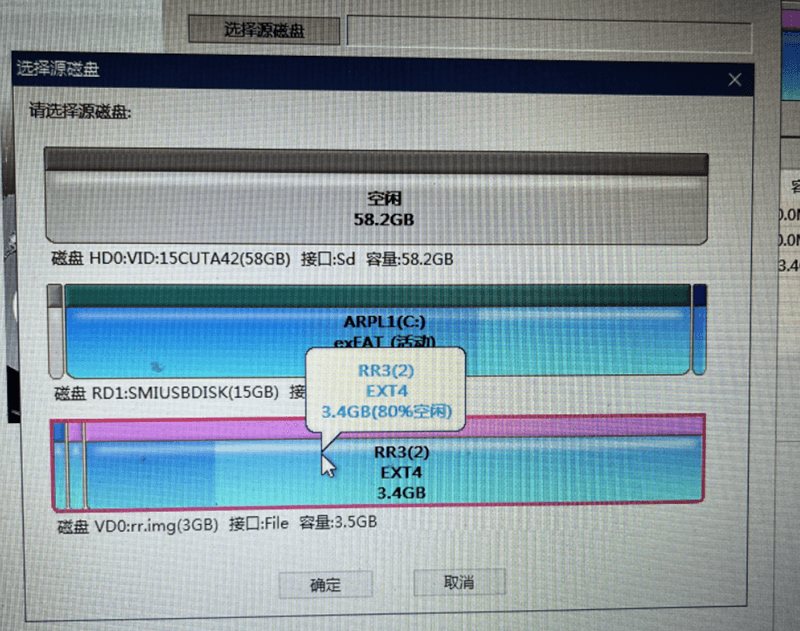
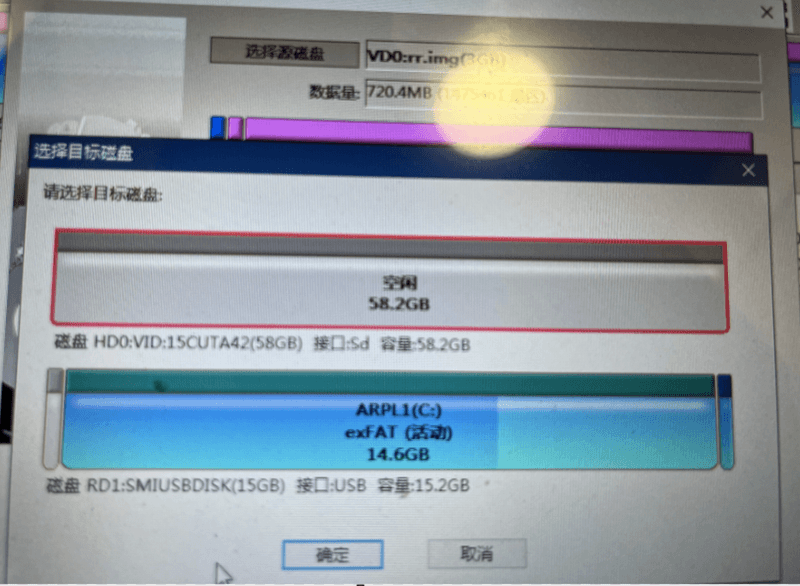
3. Copy the Xpenology image to an eMMC or SSD
Copy the RR image to the USB drive prepared in step one so that we can transfer it to the EMMC. Insert the USB drive into the machine, power on and boot, and enter the PE system from the USB drive.
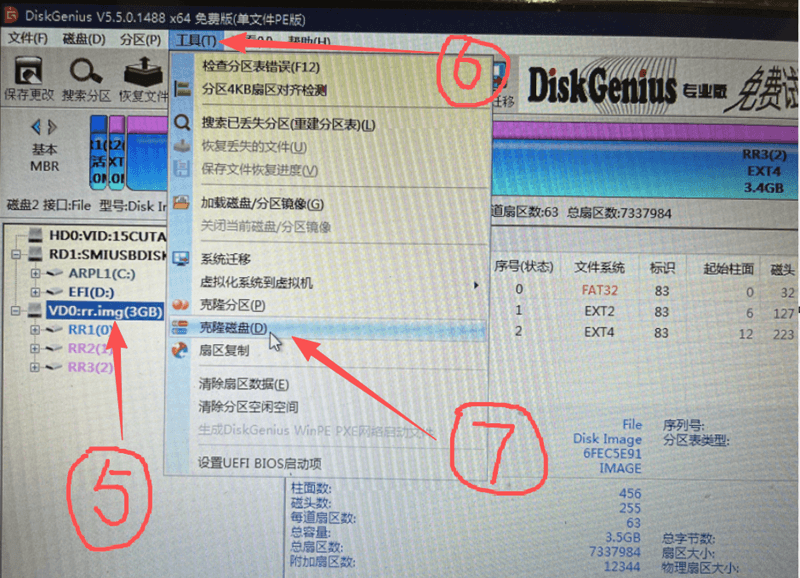
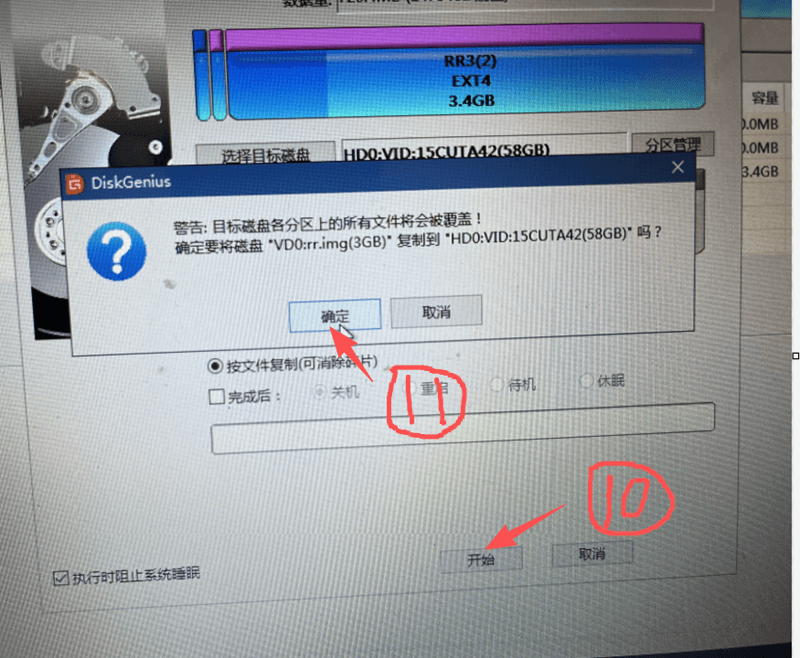
Once the cloning is complete, you can remove the USB drive and restart the machine.
The machine will then automatically install the Xpenology system. Please refer to Chapter 2 of article “How to install Xpenology on an old computer or DIY?“.
end